


この記事について
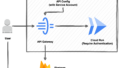
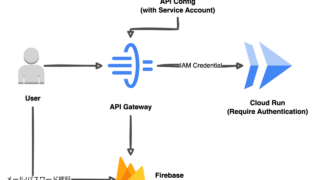
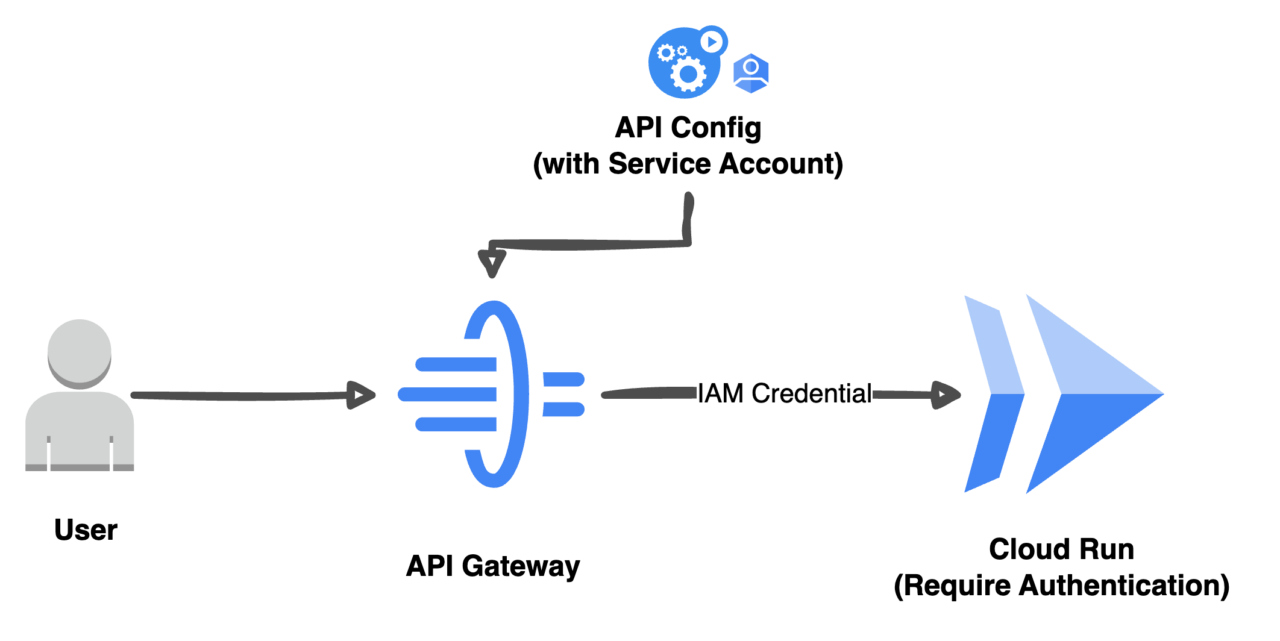
前回の記事ではAPI GatewayとそのバックエンドとしてGoogleのIAM認証により保護されたCloud Runを構成した。しかし、API Gateways自体には認証レイヤーがないためAPI Gatewayを介せば全世界からAPIを叩ける状態となっていた。
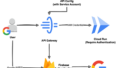
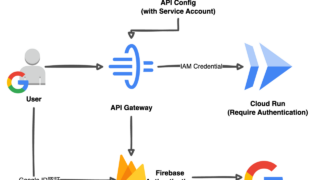
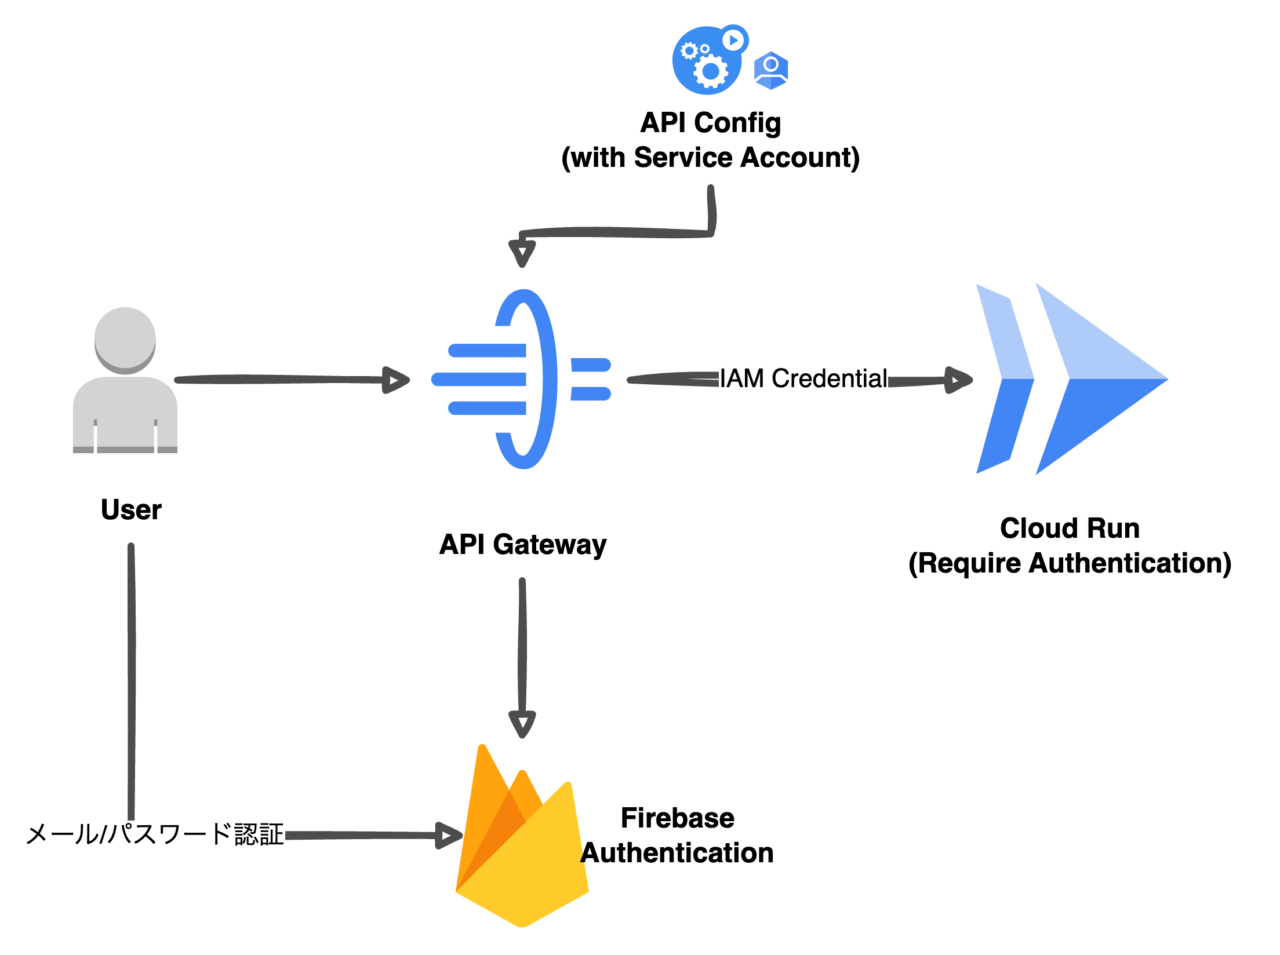
この記事ではAPI GatewayにFirebase認証を追加し、APIを実行できるユーザーを限定する。
Firebase Authにおける認証プロバイダ
主要なソーシャルログインがサポートされている。
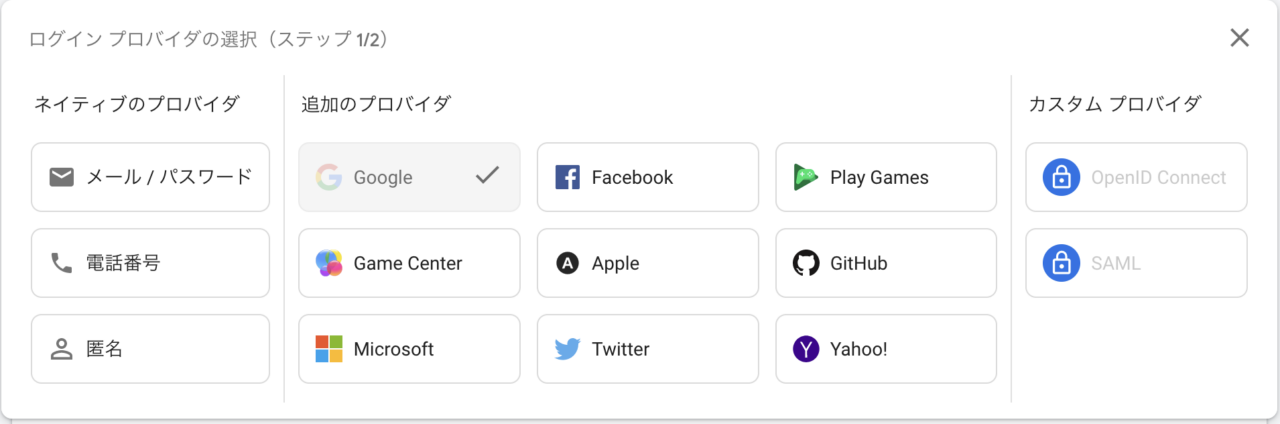
今回はメール/パスワード認証を試してみる。
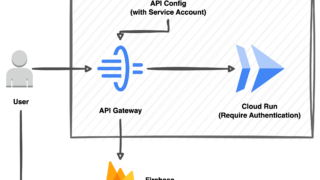
構成図
API Gatewayの構成変更
API ConfigのOpen APIドキュメントへSecurity Definitionを追加
API Gateway configで指定したYAMLにSecurity Definitionを追加する。
securityDefinitions:
  firebase:
    authorizationUrl: ""
    flow: "implicit"
    type: "oauth2"
    x-google-issuer: "https://securetoken.google.com/GCPプロジェクトID"
    x-google-jwks_uri: "https://www.googleapis.com/service_accounts/v1/metadata/x509/securetoken@system.gserviceaccount.com"
    x-google-audiences: "GCPプロジェクトID"
APIへのSecurityセクション追加
Firebase AuthはAPI全体またはパスに適用できる。
今回はAPI全体に認証をかけるべるトップレベルの階層に追加した。
securityDefinitions:
  firebase:
    authorizationUrl: ""
...
security:
  - firebase: []
paths:
  /greetings/{asset}:
  ...
API Gateway Configの追加
Firebase Authが有効な別のAPI ConfigをTerraform リソースとしてを作成する。
resource "google_api_gateway_api_config" "greetings_cfg2" {
provider = google-beta
api = google_api_gateway_api.greetings.api_id
api_config_id = "greetings-config2"
openapi_documents {
document {
path = "openapi2-run2.yaml" #Security Definitionの追加されたOpen API Specification
contents = filebase64("openapi2-run2.yaml")
}
}
lifecycle {
create_before_destroy = true
}
gateway_config{
backend_config{
google_service_account="apigw-sa@my-firebase-project-1st.iam.gserviceaccount.com"
}
}
depends_on = [
google_api_gateway_api.greetings,google_project_iam_member.project
]
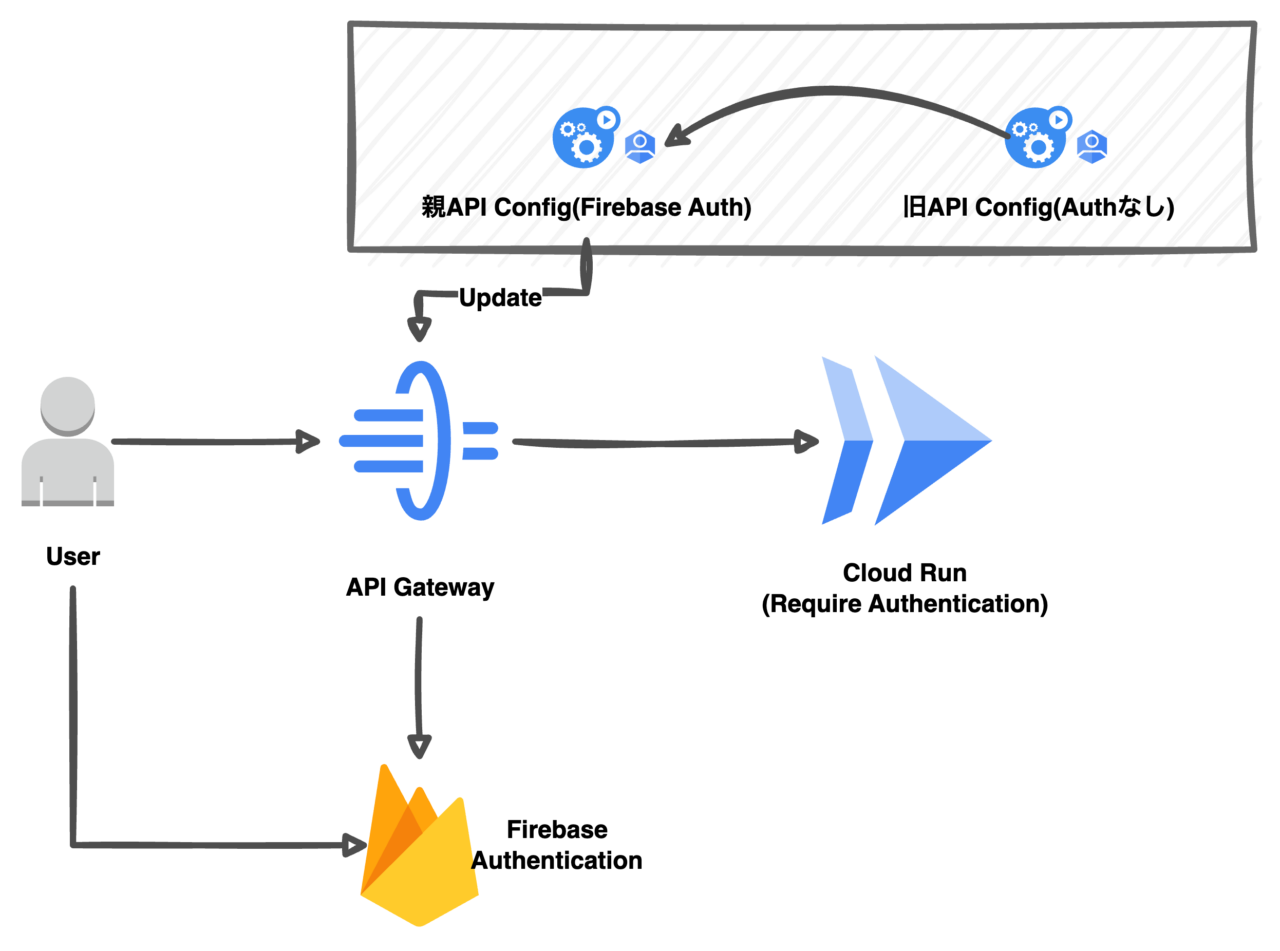
}API Gatewayの更新
API GatewayのAPI ConfigをFirebase AuthありのConfigに置き換えTerraform Applyする。
resource "google_api_gateway_gateway" "api_gw" {
  provider = google-beta
  api_config = google_api_gateway_api_config.greetings_cfg.id
  gateway_id = "greetings-gateway"
  depends_on = [
    google_api_gateway_api_config.greetings_cfg2 #ここ
  ]
}
APIへのアクセス
認証なし(アクセス不可)
有効なアクセストークンがない場合API Gatewayに対するアクセスは401 Unauthorizedとなる。
# curl https://greetings-gateway-z3kcdwt.an.gateway.dev/greetings/0

{"message":"Jwt is missing","code":401}
認証あり(アクセスOK)
Bearerトークンの取得
リクエスト
データとしてユーザーemail/passwordをJSONで与える。なお、このユーザーFirebaseプロジェクトに登録しておく必要がある。
curl -H 'Content-Type: application/json; charset=UTF-8' -H 'X-Accept: application/json' -X POST -d $BODY $URL | 変数 | 値 |
|---|---|
| $URL | https://identitytoolkit.googleapis.com/v1/accounts:signInWithPassword?key=FirebaseプロジェクトのAPIキー |
| $BODY | {"email": "user email","password":"パスワード","returnSecureToken":true} |
レスポンス
idTokenがBearerトークンである。
$ curl -H 'Content-Type: application/json; charset=UTF-8' -H 'X-Accept: application/json' -X POST -d '{"email":"testuser@examplemail12345678.com","password":"PASSWORDpassword$","returnSecureToken":true}' $URL
{
  "kind": "identitytoolkit#VerifyPasswordResponse",
  "localId": "****",
  "email": "user email",
  "displayName": "",
  "idToken": "Bearerトークン",
  "registered": true,
  "refreshToken": "リフレッシュトークン",
  "expiresIn": "3600"
}
APIリクエスト
リクエスト
Bearerトークンをヘッダに埋め込みAPI GatewayのAPIにアクセスする。
URL=https://greetings-gateway-z3kcdwt.an.gateway.dev/greetings/1
TOKEN=Bearerトークン

curl -X GET -H "Authorization: Bearer $TOKEN" $URL
レスポンス
有効なBearerトークンを伴うリクエストはAPIを実行できる。
$ curl -X GET -H "Authorization: Bearer $TOKEN" $URL
{"category":"Konichiwa","id":1,"name":"ja"}
あとがき
OPEN API SpecificationにFirebase Authのセキュリティ定義を追加することでAPI Gatewayの利用者をFirebaseにあらかじめ登録したユーザーに限定することができた。
しかし、最近のユーザーにとってはGoogle IDやTwitter IDといったソーシャルログインのほうユーザビリティが高そうだ。
次回はAPI GatewayのGoogle ID連携を試してみる。
リンク
- メール/パスワードでサインアップ
Firebase 認証 REST APIfirebase.google.com